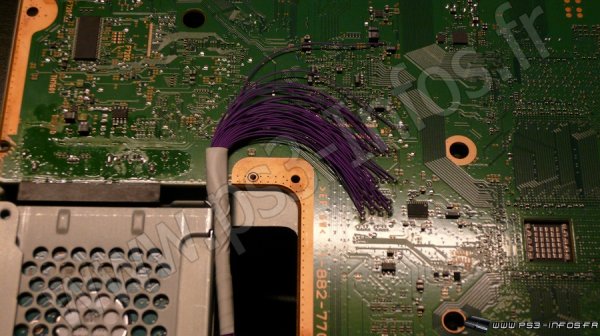
 NORway est un programme par judges pour Teensy++ 2.0 permettant de dumper/restaurer la mémoire NOR de la PS3.
Il s'agit d'une adaptation de NORalizer, par marcan.

La mise en place n'est pas donnée à tout le monde.
L'auteur affirme avoir downgradé sa PS3 avec cet outil, il va publier un tutoriel prochainement.
Version 0.2
3.3V voltage regulator required!
Changed clock speed to 8MHz
This project has been ported for the Teensy++ 2.0 from the original NOR flasher tool
("noralizer" by Hector Martin "marcan" <[email protected]>) that was used to flash
AsbestOS onto the demo PS3 at 27C3, and for experimentation.
Contents:
\teensy\NORway.avrsln - Source code for the Teensy++ 2.0 (AVR Studio 5.0)
\teensy\default\NORway.hex - Compiled hex-file for the Teensy++ 2.0 (AT90USB1286)
\hwinstall\install-*.jpg - Some pics of how I've mounted the Teensy (CECH-2504A/B)
\hwinstall\nor_testpoints.png - Connection diagram of the NOR testpoints (CECH-2504A/B)
\hwinstall\teensy.jpg - Teensy connection points (see chart below)
\serial_install.exe - Teensy serial drivers for Windows
\README.txt - this file
\NORway.py - PC Python client
Hardware connections (see "\hwinstall\nor_testpoints.png"):
PS3 Teensy
A0-7 PF0-7
A8-15 PA0-7
A16-22 PB0-6
D0-7 PD0-7
D8-15 PC0-7
CE# PE0
OE# PE1
RESET# PE4
WE# PE5
RY/BY# PE6
TRISTATE# PE7
GND GND
The Teensy requires a 3.3V voltage regulator! 5V trace has to be cut and 3V pads have to be shorted!
Please refer to https://www.pjrc.com/teensy/3volt.html
DON'T CONNECT THE VCC SOLDER PADS TO ANYTHING!
Connection diagrams for other boards can be found at:
http://ps3devwiki.com/index.php?title=Hardware_flashing
Prerequisites for Windows:
Python 2.7.2 (http://www.python.org/ftp/python/2.7.2/python-2.7.2.msi)
pyserial 2.5 (http://pypi.python.org/packages/any/p/p ... .win32.exe)
Usage:
Install Python + pyserial (see "Prerequisites for Windows"). Install drivers. Connect Teensy
to your PC. Flash Teensy with "\teensy\default\NORway.hex" and reset it after completion. Start
Windows' "Device Manager", expand the "Ports (COM & LPT)" node, you should see something like
"USB Serial (Communication Class, Abstract Control Model) (COM4)". This tells you that "COM4"
(or whatever shows up) is the COM port used by Teensy.
At the command prompt enter "NORway.py" to display help.
Procedure to dump your flash:
- PS3 is turned off
- At the command prompt enter:
NORway.py <your com port>
- Turn on your PS3, it shouldn't boot
- At the command prompt enter:
NORway.py <your com port> dump flash.bin
- When dumping is finished enter:
NORway.py <your com port> release
- Power off your PS3 (disconnect Teensy if PS3 doesn't boot when restarted)
Dumping takes about 5 minutes. A file "flash.bin" with a size of exactly 16 MB (16.777.216 bytes)
has been created in your current directory.
Flashing is rather slow. Writing a complete flash with the "write" command takes about 2 hours.
Might be improved in future versions...
IMPORTANT:
Before you flash your PS3 with anything new, make sure that the content of your dump is correct
(e.g. compare ros0/ros1 area of your dump against "CORE_OS_PACKAGE.bin" from an actual PS3UPDAT.PUP
of your current firmware). And keep your original dump in a safe place. You might need it.
It's tested on Win7 x86, but should also work just fine on any x86 Windows >=XP.
Basically it should also work on Linux, but I didn't test. If you're running Linux, you
probably know what to do.Serial drivers are not required for Linux.
Unfortunately I couldn't manage to make it work on any x64 version of Windows, because of
the Python pyserial module.
Thanks to "marcan" for the original implementation.
-- judges ([email protected])
 Télécharger NORway 0.2 - Teensy++ 2.0 Flasher Software
 Site officiel : http://psx-scene.com/forums/f149/norway-teensy-2-0-flasher-software-94388/#post901655